How to fix if you can’t open Windows Security in Windows 11
Microsoft hasn«t changed its standards and added its built-in antivirus to Windows 11, although it has changed its name a bit. It is now called Windows Security.
It often shows itself as a reliable protector against various system security threats. However, it still has drawbacks. In addition to system load issues, some Windows 11 users complain that they can«t access Windows Security. It simply won«t open. This is usually due to some system error or bug.
Fortunately, there are many ways to fix this. Often a simple PC reboot will help. So it is worth doing that first. If rebooting doesn«t help, then follow the methods described below.
Let«s take a closer look at each one.
Ensure Windows Security is turned on
If you previously used an external antivirus on your Windows 11 PC, the built-in antivirus may have automatically shut down. To check this, do the following:
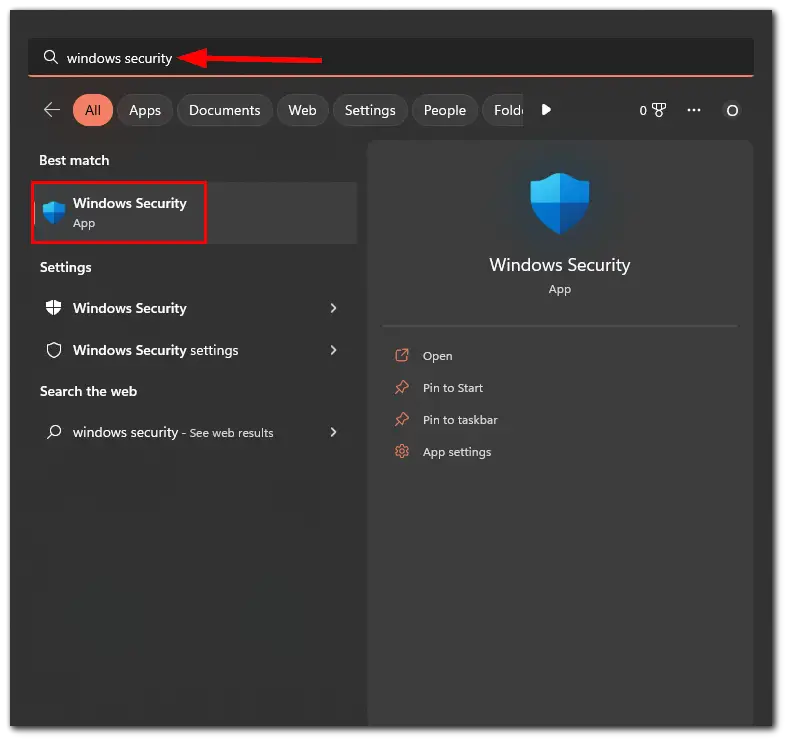
- Go to the Start menu and enter Windows Security in the search bar.
- Click on it to open.

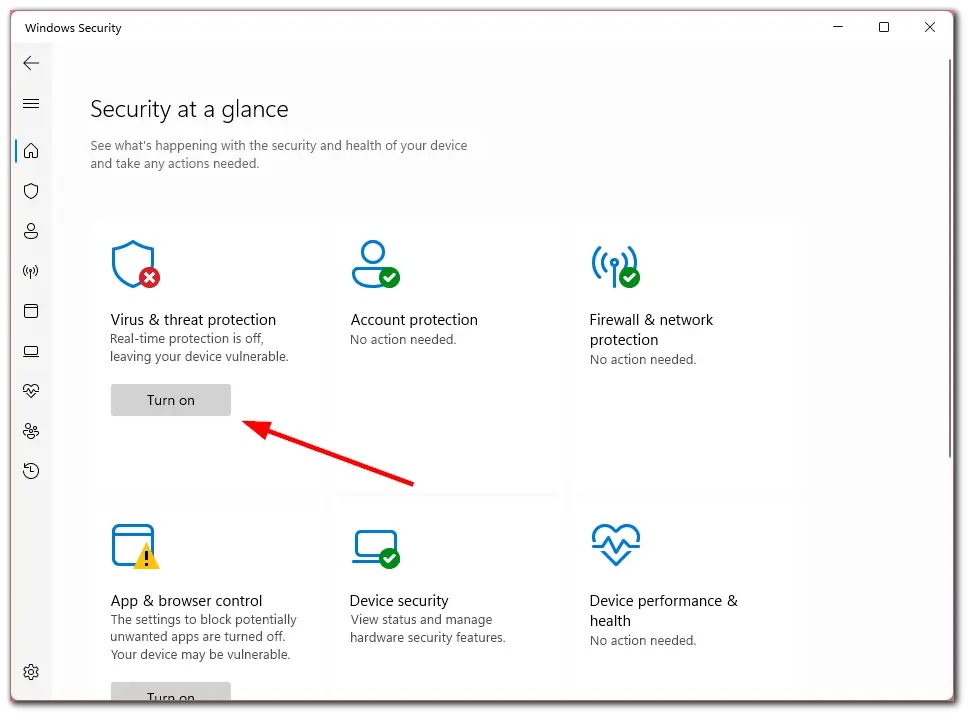
- Then check whether the Virus & threat protection option is enabled.
- If not, just press Turn on.

Also, make sure that your third-party antivirus is turned off. The fact is that additional and built-in antiviruses can conflict with each other. Therefore unnecessary antivirus should be uninstalled.
If you still cannot open Windows Security, go to the next step.
Update Windows
A simple Windows update often helps with most errors. This can also help when you can«t open Windows Security. So check for updates, and if any are available, run them. Here«s how you can do this in more detail.
- Press Win + I to open Settings and go to Windows Update.
- Then click Check for updates.

- So now download and install updates.
If that doesn«t work, see the following method.
Reset the Windows Security app
If you want to start this process, you can follow these steps:
- Press Win + I to open Settings and go to the Apps section.
- After that, go to Installed apps and find Windows Security.
- Then click on the three dots button and select Advanced options.

- Scroll down to the Reset section and click Repair.
- If this doesn«t help, click Reset.

Once you have completed these steps, restart your PC to ensure that the changes are applied. Then, run Windows Security to see if the app runs without crashing.
Reset Windows Security using PowerShell
There«s an option to reset Windows Security using PowerShell. To do so, follow these instructions:
- Go to the Start menu and enter PowerShell in the search bar.
- Then click Run as Administrator.

- After that, copy and paste this command into the PowerShell and press Enter:
- Get-AppxPackage Microsoft.SecHealthUI -AllUsers | Reset-AppxPackage

Now restart your Windows 11 PC and check that the Windows Security app works fine.
Run the SFC scan
Faulty system files can also cause an error in Windows Security. An SFC scan will help detect and fix it. Therefore, do the following:
- Go to the Start menu and enter cmd in the search field.
- Click Run as administrator.
- Then type in the following command: sfc /scannow

- Finally, press Enter and wait until the process is completed.
Once you have completed these steps, restart your PC.
Run the DISM scan
Just as the SFC tool helps fix your PC, the DISM scan finds and fixes any system image problems that may be causing problems with your PC. So follow these steps:
- Go to the Start menu and enter cmd in the search field.
- Click Run as administrator.
- Then type in the following command: DISM /Online /Cleanup-Image /ScanHealth
- Finally, press Enter and wait until the process is completed.
Keep in mind that the process may take up to ten minutes. When this step is complete, restart your computer for the changes to take effect.
With the fixes described above, you can fix the problem with the Windows Security app on your PC. However, if you still fail, the best solution is to contact a specialist in the service center or write to Microsoft support.
© tab-tv
